Building an Accessory Dwelling Unit transforms your property by adding functional living space that serves multiple purposes. Whether you’re creating rental income, housing family members, or establishing a personal retreat, understanding each phase of construction helps you make informed decisions and set realistic expectations.
Understanding ADU Construction
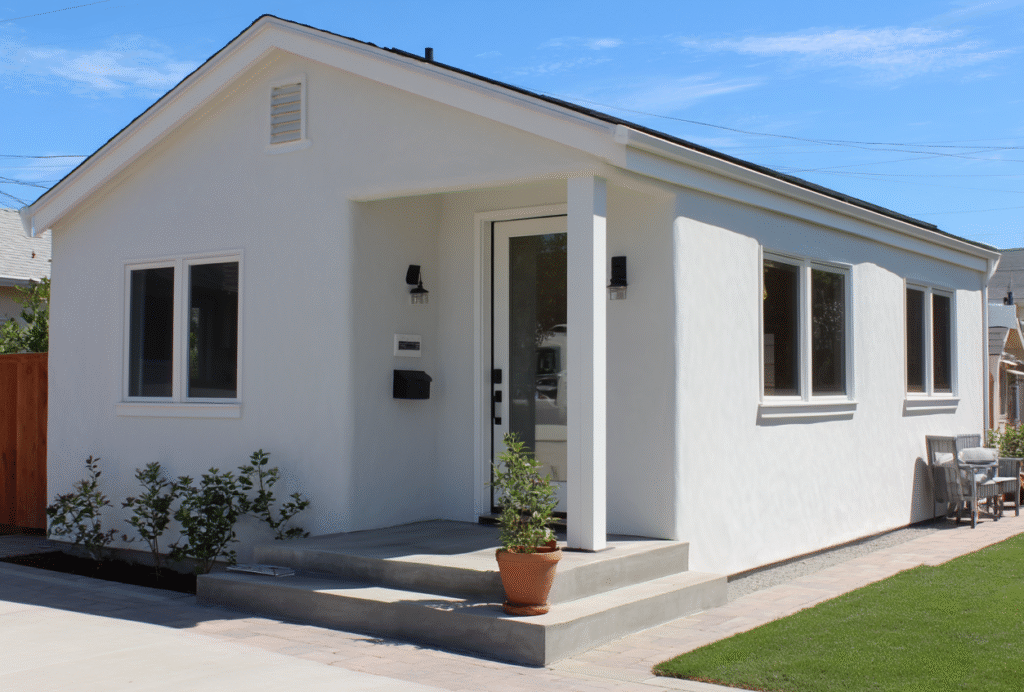
Accessory Dwelling Units have become increasingly popular across the country. These secondary structures provide independent living spaces with their own kitchens, bathrooms, and sleeping areas. Homeowners build ADUs for various reasons—generating rental income, accommodating aging parents, creating space for adult children, or establishing home offices separate from the main house.
The construction of a tiny house or full-sized ADU follows similar principles but requires careful planning and execution. Unlike adding a room to your existing home, ADUs are standalone structures with complete systems and utilities. This complexity means you need to understand the ADU construction process before breaking ground.
Planning and Pre-Construction Stage
Every successful ADU home construction begins with thorough planning. This phase determines your project’s scope, budget, and feasibility.
Assessing Your Property and Goals
Start by evaluating your property. How much space do you have available? Where could an ADU fit while meeting setback requirements? Consider access for construction vehicles, connection points for utilities, and how the new structure will relate to your existing home.
Think carefully about your goals. What will the ADU be used for? Full-time residence requires different features than occasional guest quarters. Rental units need durable finishes and separate meters for utilities. Home offices prioritize workspace over kitchen amenities. Clear goals guide every subsequent decision in the ADU construction process.
Budgeting and Financing
ADU construction typically costs between $100,000 and $300,000, depending on size, finishes, and location. Establish a realistic budget early, including contingency funds for unexpected expenses. Most professionals recommend adding 10-20% to your estimated costs as a buffer.
Explore financing options. Some homeowners pay cash, others take home equity loans or construction loans. Each approach has different implications for project timing and flexibility. Understand your financing terms before committing to contracts.
Designing Your ADU
Design transforms your vision into buildable plans. Many homeowners work with architects or designers who specialize in ADUs. These professionals understand how to maximize small spaces, incorporate required features efficiently, and create attractive, functional layouts.
During design, you’ll make decisions about:
- Overall size and floor plan configuration
- Number and size of rooms
- Kitchen and bathroom layouts
- Storage solutions
- Window and door placement
- Exterior style and materials
Quality design sets the foundation for successful construction. Don’t rush this phase—changes during construction cost significantly more than adjustments on paper.

Permitting and Legal Considerations
Legal requirements vary by location, but always play a critical role in the ADU construction process.
Understanding Local Zoning and Regulations
Before finalizing designs, research local zoning regulations. These rules govern maximum ADU size, height restrictions, setback requirements from property lines, parking provisions, and more. Some areas prohibit ADUs entirely, while others actively encourage them.
Cities and counties often have specific ADU ordinances separate from general residential codes. These regulations continue evolving as jurisdictions respond to housing needs. Work with professionals familiar with current local requirements.
Applying for Permits
Permit applications require detailed plans, engineering calculations, and supporting documentation. The process typically involves submitting plans to the building department, addressing reviewer comments, and obtaining approval before construction begins.
Permit approval timelines vary widely—from a few weeks to several months. Factor this into your project schedule. Starting construction without proper permits risks fines, stop-work orders, and difficulties selling your property later.
Site Preparation and Foundation
Once permits are approved, physical construction begins with site preparation.
Preparing the Site
Site preparation involves clearing the building area, establishing access for equipment, and protecting existing structures and landscaping. Contractors may need to remove trees, level ground, or relocate utilities. Proper site prep prevents problems during subsequent construction phases.
Temporary fencing often goes up to define the construction zone and improve safety. Portable toilets, material storage areas, and equipment staging require space beyond the actual building footprint.
Laying the Foundation
Foundation type depends on soil conditions, building size, and local requirements. Options include concrete slabs, pier and beam systems, or full basements in some locations. The foundation must be level, properly sized, and correctly reinforced.
Foundation work includes installing utilities—water lines, sewer or septic connections, electrical service, and gas lines if applicable. Getting these right matters because fixing foundation problems later is extremely expensive. This critical phase of the ADU construction process sets literal groundwork for everything that follows.
Framing and Structural Construction
With foundations complete, vertical construction begins.
Building the Framework
Framing creates the skeleton of your ADU. Walls go up, followed by roof framing. This phase transforms an empty lot into something recognizably house-shaped. Framing happens relatively quickly—a typical ADU frame takes one to two weeks.
Proper framing ensures walls are straight, corners are square, and the structure is plumb and level. Windows and doors get framed with appropriate headers. The roof structure must handle anticipated loads, including the roof itself, any snow or wind loads, and potential solar panels.
Incorporating Structural Materials
Tiny house construction materials vary by design and budget. Standard framing uses dimensional lumber—typically 2x4s or 2x6s for walls and larger members for roof structures. Some builders use engineered lumber for longer spans or challenging applications.
Quality materials matter. Pressure-treated lumber protects sill plates from moisture. Proper fasteners ensure structural integrity. Sheathing materials like OSB or plywood provide lateral stability and create surfaces for exterior finishes. These structural decisions affect your ADU’s longevity and performance.
Installing Systems and Utilities
Once the structure is framed and weather-tight, interior systems get installed.
Electrical and Plumbing
Electricians run wiring for outlets, switches, lighting, and appliances. ADUs need complete electrical systems, including service panels, proper grounding, and sufficient capacity for anticipated loads. Modern codes often require AFCI and GFCI protection in specific locations.
Plumbers install supply lines for fixtures, drain and vent systems, and water heaters. Compact spaces demand careful planning to route these systems efficiently. Quality plumbing prevents leaks and water damage that could compromise your structure.
HVAC and Energy Systems
Heating and cooling keep ADUs comfortable year-round. Options range from mini-split heat pumps to traditional forced-air systems, depending on climate and building design. Proper sizing ensures efficiency—oversized systems waste energy while undersized ones can’t maintain comfort.
Insulation and air sealing dramatically affect energy performance. Dense-pack walls, quality ceiling insulation, and sealed penetrations create efficient building envelopes. Many builders exceed code minimums here because the energy savings continue for the building’s lifetime.
Interior and Exterior Finishes
With rough systems installed and inspected, finish work transforms the construction site into a livable space.
Exterior Finishes
Exterior finishes protect the structure while defining its appearance. Options include siding, stucco, brick, stone, or combinations. Roofing materials—shingles, metal, tile—must suit your climate and architectural style.
Don’t neglect details like trim, fascia, and soffit work. Quality exterior finishes shed water away from the structure, preventing moisture problems. Proper flashing around windows and doors prevents leaks. These details separate professional construction from amateur work in the ADU construction process.
Interior Construction
Interior finishes include drywall, paint, flooring, cabinets, countertops, and fixtures. This phase takes longer than many homeowners expect because it involves numerous detailed tasks. Each trade must complete its work in proper sequence.
Cabinet installation, tile work, trim carpentry, and final paint coats transform raw spaces into finished rooms. Fixture installation makes bathrooms and kitchens functional. Hardware, outlet covers, and final details complete the look.

Inspections and Final Approvals
Throughout construction, building inspectors verify code compliance at key stages. Typical inspections include foundation, framing, electrical rough-in, plumbing rough-in, insulation, and final inspections.
Failed inspections require corrections before proceeding. Experienced builders schedule inspections appropriately and prepare for them by ensuring work meets code. The final inspection, if passed, results in a certificate of occupancy allowing legal habitation.
Some jurisdictions require additional inspections—fire safety, energy compliance, or accessibility reviews. Understand what your location requires and budget time accordingly. These inspections protect you by ensuring safe, code-compliant construction.
Post-Construction Considerations
The ADU construction process doesn’t end when you receive your certificate of occupancy. Several important tasks remain.
Final cleanup removes construction debris and prepares the site for use. Landscaping repairs areas disturbed during construction. Walkways, drainage, and exterior lighting complete the outdoor space.
Collect warranty information for appliances, systems, and materials. Many builders provide their own workmanship warranties covering defects for one or more years. Understand what’s covered and how to request service if problems arise.
Building Your ADU Successfully
Understanding the complete ADU construction process helps you approach your project with realistic expectations and informed decision-making. From initial planning through final inspections, each phase builds on previous work. Quality decisions early in design, materials, and contractor selection—pay dividends throughout construction and for years afterward.
Whether building a compact tiny house or a larger ADU home construction, attention to detail matters. Work with experienced professionals, use quality tiny house construction materials, and don’t rush critical decisions. The result will be a valuable addition to your property that serves your needs for decades.
Also, you can check more information here:
• https://goshentinyhomes.com/services/detached-adus/
• https://goshentinyhomes.com/services/backyard-adu/
• https://goshentinyhomes.com/adu-floor-plans/
Useful information about laws:
• FL ADU Guidebook (process & permitting)
• FL land development regulations (Ch.163 Part II) (flhousing.org)